Update: this post was written in early 2012 when Play 2.0 was beta software and is preserved for posterity. I make no promises about its suitability for current development with Play, and hope to do an updated post in future.
The source code for this guide can be found in the github repository.
Websockets allow full-duplex communication over a TCP socket, normally between a browser and a server-side application. In a similar vein to this post on websockets in Play 1.x, this article shows how to create a websockets-enabled application in Play 2.0.
Remember that Play 2.0 is still in beta, so the APIs shown below are subject to change. If that happens, I’ll endeavour to update this article with the changes.
Obtaining Play 2.0
I encountered an issue with the packaged beta, so I downloaded the Play source (full instructions):
1 2 3 | |
While it builds, you’ll probably want to get some coffee. Then, at the sbt prompt:
1
| |
Now, create the project:
1
| |
You can run the eclipsify command (or equivalent) if you want to open the project in your IDE.
Creating the Websockets Controller
With setup done, let’s define the controller that will serve our index page and establish a websocket with the client. Open controllers/Application.java and add the following code:
1 2 3 4 5 6 7 8 9 10 11 12 13 14 15 16 17 18 19 20 21 22 23 24 25 26 27 28 29 30 31 32 | |
As you can see, alongside the pre-generated code, we’ve added a static method sockHandler that returns a websocket. The inner onReady method takes two arguments: the in channel and out channel.
At this point, we could pass those channels to a model which retains them. But for this example, we simply register a logger for inbound messages, and write a greeting message to the out socket.
Routing the Websocket Connection
Next, we need to add a route to our websocket connection. In conf/routes, add the following:
1 2 3 4 5 6 7 8 9 10 | |
We don’t actually request /greeter explicitly; instead, we’ll use a reverse generated URL in our template.
Adding the Template
Now that we have our controller and route in place, we can specify the client-side code for our websocket.
1 2 3 4 5 6 7 8 9 10 11 12 13 14 15 16 17 18 19 20 21 22 23 | |
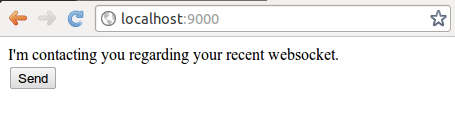
Here, we declare a greeting which is populated when the websocket receives a message. We also register a button action to send a message to the server, so we can demonstrate bi-directional messaging. If you’re familiar with Play 1.x, you’ll notice that the templating is a little different.
Now, when we start the app, we see the following.
Clicking the Send button generates the following log line:
1
| |
Conclusion
So, that’s all that needs to be done to create a websocket-enabled application in Play. We’ve both sent messages from, and to, the browser with simple code on both client and server side. In a real application, we would probably pass the in and out streams to a model, but it should be straightforward to see how this is done from the example.
For further information, you can look at the examples, particularly the websocket chat app, upon which this guide is based. In a future post I’d like to go into more detail by looking at the Akka actor model implementation, which is used in the chat application sample.
This article comes with a small disclaimer – Play is still a new framework to me, so some of the above code may not demonstrate best practice (although I did attempt to follow the sample application closely). If you notice anything that could be improved, let me know and I’ll update accordingly.